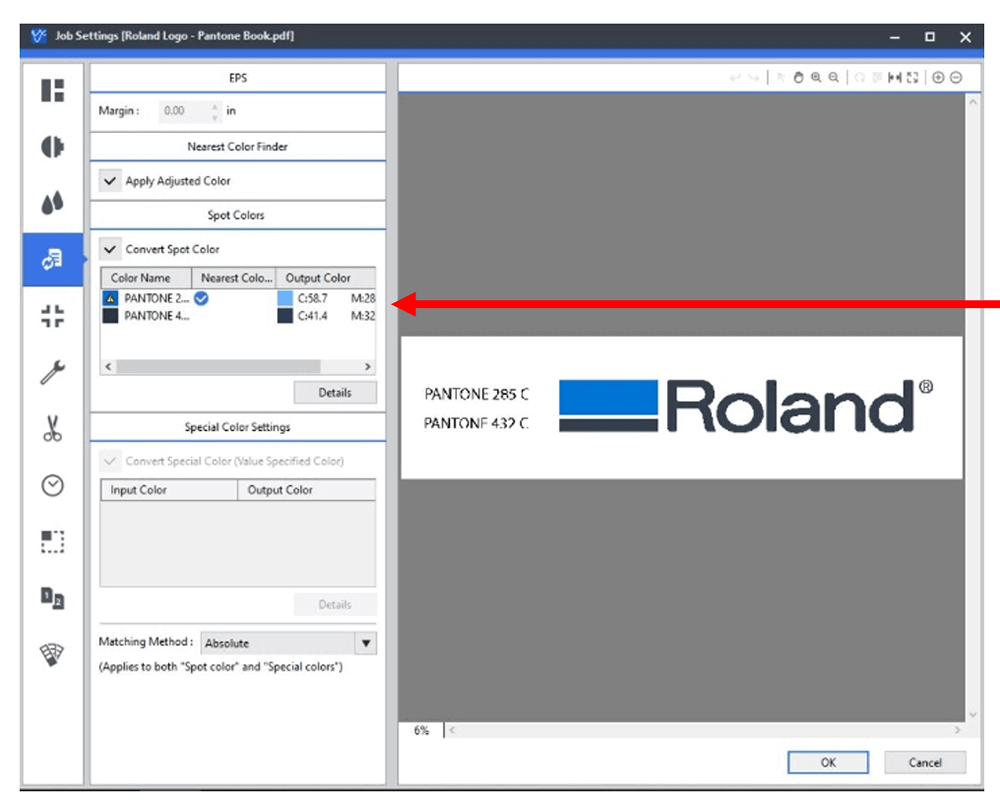
One of the really cool features available in VersaWorks is the “Nearest Color Finder” tool. It allows you to select a Spot Color and find the “best” representation of the color the device is printing based on your color management settings (paper type/print mode/.icc profile, etc.). While this tool can be incredibly useful, there are some rules, outlined below, that must be followed in order to take advantage of the feature:
RULE #1
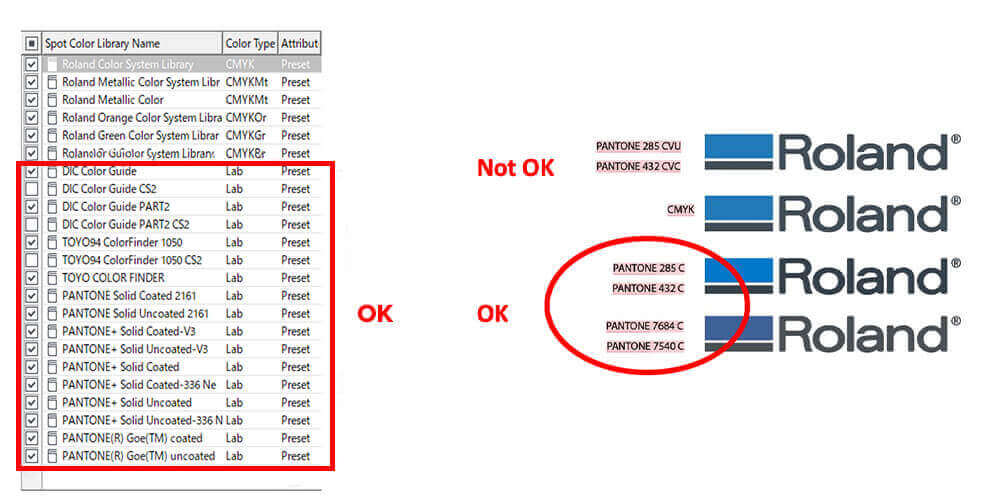
It must be a SPOT color! This means CMYK colors, RGB colors, or LAB colors made in Illustrator, Corel or similar applications, will NOT work. It must be a SPOT color (like Pantone).
RULE #2
Not all SPOT colors will work.
HOW DOES THE TOOL WORK?
So, how do we go about using this tool? Here’s a brief step-by-step tutorial for you to try, practice, and utilize at your facility! Once you have a file with the SPOT Color in it, proceed with the following:
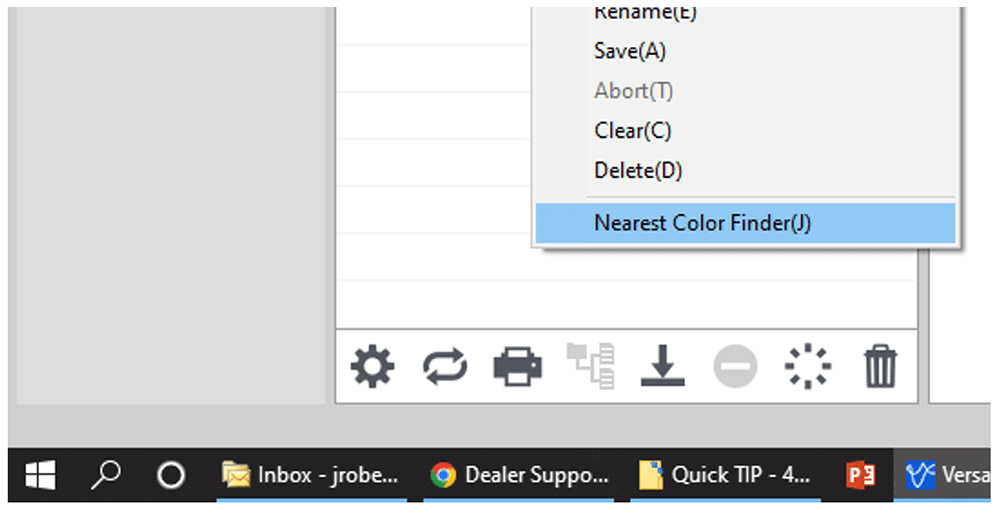
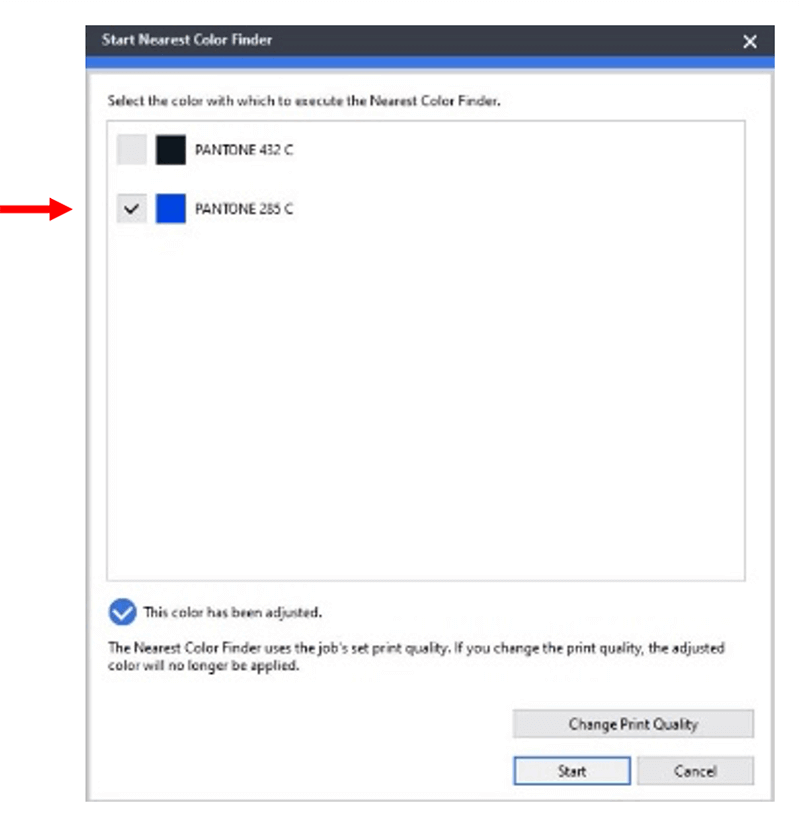
STEP 1
- Load the file and click on Nearest Color Finder
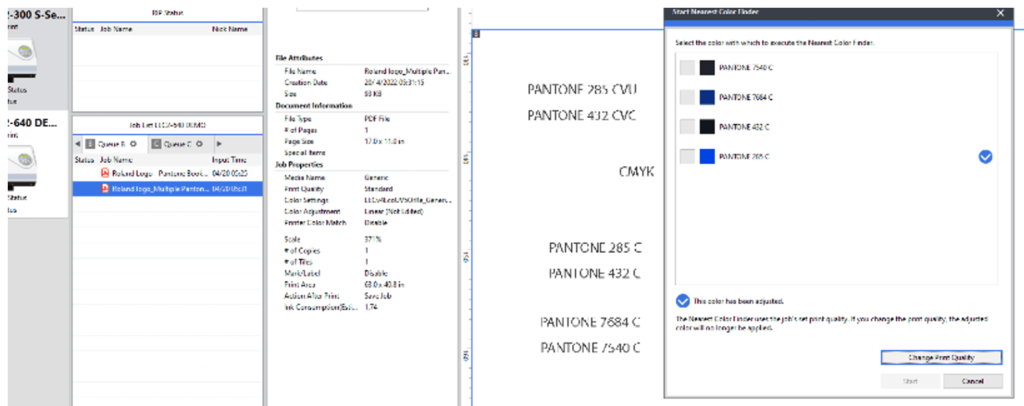
STEP 2
- Select the SPOT color to be “tested”
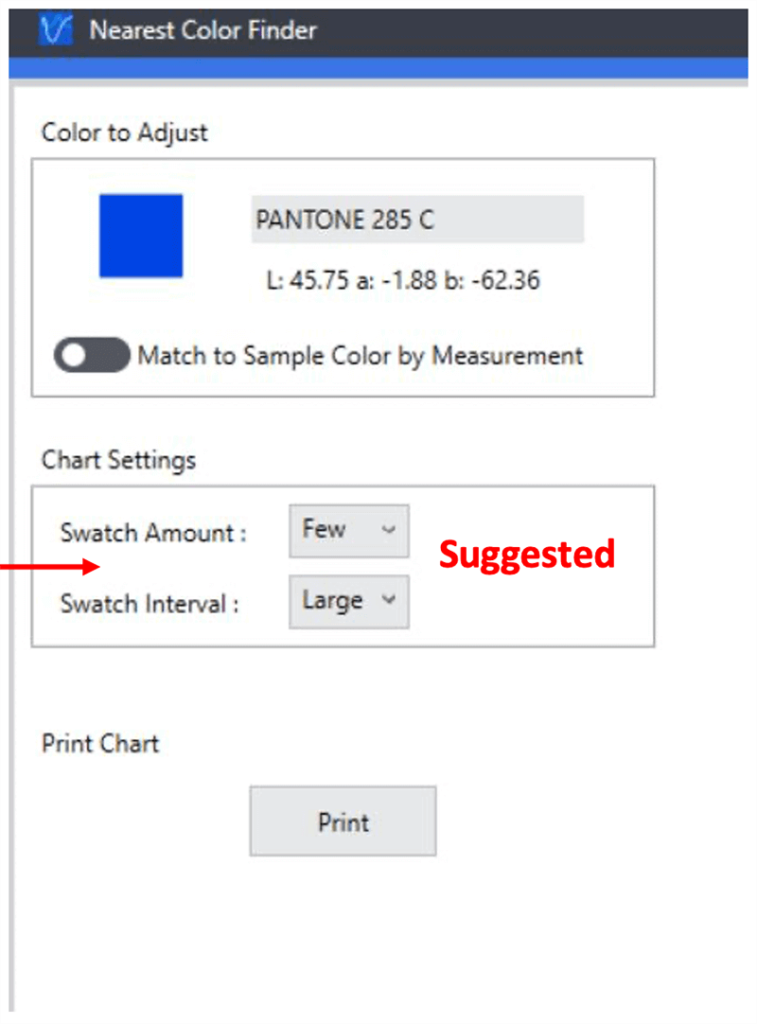
- Set the values to define the number of patches
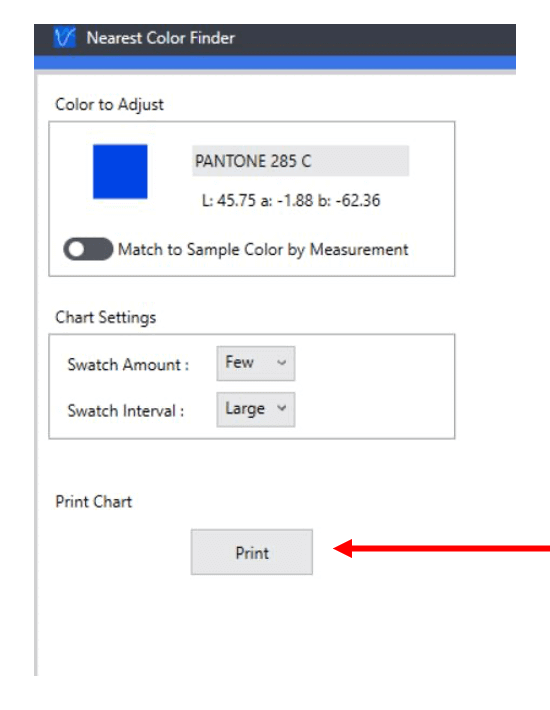
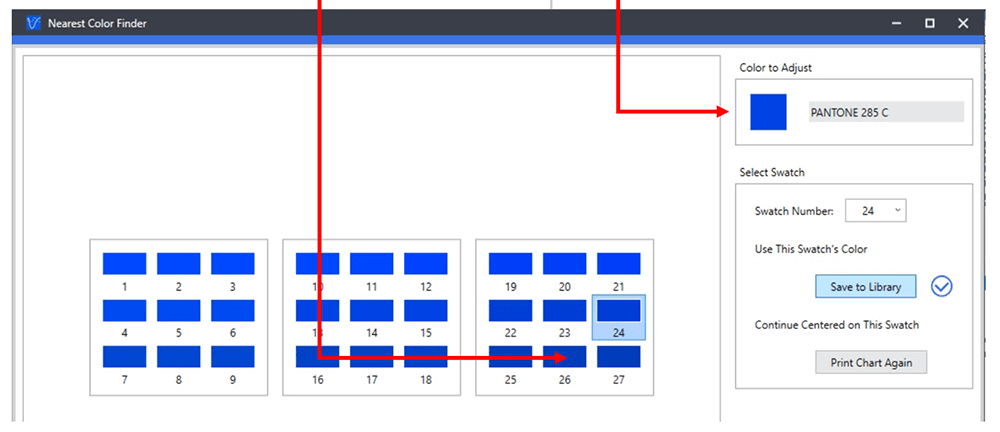
STEP 3
- Print and Review
- Once the print is done, select the SPOT that best represents the color desired and “highlight” the box
STEP 4
- Print the job
- NOTE: In the VersaWorks File Format tab, the color selected will now show as the desired color.